


 Hide All
You can create a parameterized report with ActiveReports Developer and provide an "All" choice for users who want to see all of the data as well as the ability to select multiple values for those who want to see data for several items.
This walkthrough illustrates how to create a report with multivalue parameters and an option to select all of the data.
The walkthrough is split up into the following activities:
- Adding an ActiveReport to a Visual Studio project
- Connecting the report to a data source
- Adding a Dataset with a parameter
- Creating a Dataset to populate the parameter values
- Adding a Report Parameter
- Adding controls to the report to contain data
- Viewing the report
 |
Note: This walkthrough uses the Movie table from the Reels database. By default, in ActiveReports Developer, the Reels.mdb file is located in the [User Documents folder]\ComponentOne Samples\ActiveReports Developer 7\Data folder. |
When you complete this walkthrough you get a layout that looks similar to the following at design time and at runtime.
Design Time Layout


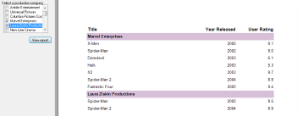
Runtime Layout
 To add an ActiveReport to the Visual Studio project
- Create a new Visual Studio project.
- From the Project menu, select Add New Item.
- In the Add New Item dialog that appears, select ActiveReports 7 Page Report and in the Name field, rename the file as MoviesByProducer.
- Click the Add button to open a new fixed page report in the designer.
See Adding an ActiveReport to a Project for information on adding different report layouts.
To connect the report to a data source
- In the Report Explorer, right-click the Data Sources node and select the Add Data Source option or select Data Source from the Add button.
- In the Report Data Source Dialog that appears, select the General page and in the Name field, enter a name like ReportData.
- On this page, create a connection to the Reels database. See Connect to a Data Source for information on connecting to a data source.
To add a dataset to populate the parameter values
- In the Report Explorer, right-click the data source node and select the Add Data Set option.
- In the DataSet Dialog that appears, select the General page and enter the name of the dataset as Producers. This name appears as a child node to the data source icon in the Report Explorer.
- On the Query page of this dialog, in the Query field enter the following SQL query.
SQL Query  Copy Code
SELECT -1 AS ProductionID, "(All)" AS Name FROM Producers UNION SELECT ProductionID, Name FROM Producers; - Click the Validate DataSet icon at the top right hand corner above the Query box to validate the query.

- Click OK to close the dialog. Your data set and queried fields appear as nodes in the Report Explorer.
To add a parameter to the report
- In the Report Explorer, select the Parameters node.
- Right-click the node and select Add Parameter to open the Report - Parameters dialog.
- In the dialog box that appears, click the Add(+) button to add a new parameter in the list.
- Set properties in the following fields below the parameters list.
In the General tab:
- Name: ProductionID
- DataType: Integer
- Text for prompting users for a value: Select a production company.
- Select the check box next to Multivalue to allow users to select more than one production company from the list.
In the Available Values tab select From query:
- DataSet: Producers
- Value: ProductionID
- Label: Name
Note: The name of the parameter you enter must exactly match the name of the parameter in the linked report, and it is case sensitive. You can pass a value from the current report to the parameter in the Value column of the list. If a value is not supplied for an expected parameter in the linked report, or if the parameter names do not match, the linked report will not run.
- Click OK to close the dialog and add the parameter to the collection. This parameter appears under the Parameters node in the Report Explorer.
To add a dataset with a parameter
- In the Report Explorer, right-click the data source node and select the Add Data Set option.
- In the DataSet Dialog that appears, select the General page and enter the name of the dataset as Movies. This name appears as a child node to the data source icon in the Report Explorer.
- On the Parameters page under Parameter Name enter Param1.
- Under Value enter
=Parameters!ProductionID.Value - On the Parameters page under Parameter Name enter Param2.
- Under Value enter
=Parameters!ProductionID.Value - On the Query page of this dialog, in the Query field enter the following SQL query.
SQL Query Copy CodeSELECT Movie.Title, Movie.YearReleased, Movie.UserRating, Producers.Name FROM Producers INNER JOIN (Movie INNER JOIN MovieProducers ON Movie.MovieID = MovieProducers.MovieID) ON Producers.ProductionID = MovieProducers.ProductionID WHERE (MovieProducers.ProductionID IN (?)) OR (-1 IN (?)) ORDER BY MovieProducers.ProductionID, Movie.YearReleased;
- Click the Validate DataSet icon at the top right hand corner above the Query box to validate the query.
- Click OK to close the dialog. Your data set and queried fields appear as nodes in the Report Explorer.
To create a layout for the report
- From the toolbox, drag a Table control onto the design surface and in the Properties window, set the following properties.
Property Name Property Value Location 0in, 1in DataSetName Movies FixedSize (only for FPL reports) 6.5in, 7.5in - Click inside the table to display the column and row handles along the top and left sides of the table.
- To visually group the data within the report, right-click the icon to the left of the detail row and select Insert Group.
- In the Table - Groups dialog that appears, under Expression select
=Fields!Name.Valueto group all details from each producer. - Change the Name to Producer.
Note: You cannot change the name of a table group until after you have set the expression. - On the Layout tab of the Table - Groups dialog, select the check box next to Repeat group header to ensure that the header is printed at the top of each page.
- Clear the check box next to Include group footer as we will not be using it for this report.
- Click OK to close the dialog.
- In the Report Explorer, from the Movies dataset drag the following fields into the detail row of the table and set their properties as in the following table.
Field Column Width Title TableColumn1 3.9in YearReleased TableColumn2 1.3in UserRating TableColumn3 1.3in - Static labels with the field names are automatically created in the table header row. To improve the appearance of the report, select the table header row, and set the text to Bold and change the FontSize to 11pt.
- From the Report Explorer, the Movies dataset drag the Name field into the first column of the group header row of the table and set the following properties.
Property Name Property Value FontWeight Bold BackgroundColor Thistle 
Tip: Use the Shift key to select all three text boxes in the group header row, right-click and select Merge Cells to prevent long production company names from wrapping.
- Click the preview tab to view the report at design time.
OR
- Open the report in the Viewer. See Using the Viewer for further information.